
A Professional Photographer’s Mac Studio Straight-forward Review & Recommendations without the Techno-babble!
When it came time for me to replace my 2019 27” iMac, I knew I was going to get the Mac Studio - I thought it would be a straight-forward purchase, but boy was I wrong. As soon as I started my research I got sucked into a rabbit hole that was extremely deep and confusing. I ended up watching a million and one technical videos that sucked a ton of my time (and a little of my soul if I’m honest). I’ll never get that time back - so even though this isn’t the type of blog post I typically write, I’m putting it out there for all you other photographers who aren’t interested in reading and watching technical videos about performance tests and a whole lot of other techno-babble that provides you with nothing other than mass confusion.
In other words, if you are a professional photographer who just wants to cull and edit efficiently - take a few minutes to read this.
THE MAC STUDIO

I’m going to keep it simple. Unless you lots of extra cash lying around don’t even entertain buying the Mac Studio Ultra…seriously, the Max is more than sufficient for professional photo & basic video editing. Save your hard-earned money for a nice monitor and add-on accessories, or even better - some quality glass!
After a ton of research, here is the Studio Max configuration that I opted for.
THE PROCESSOR
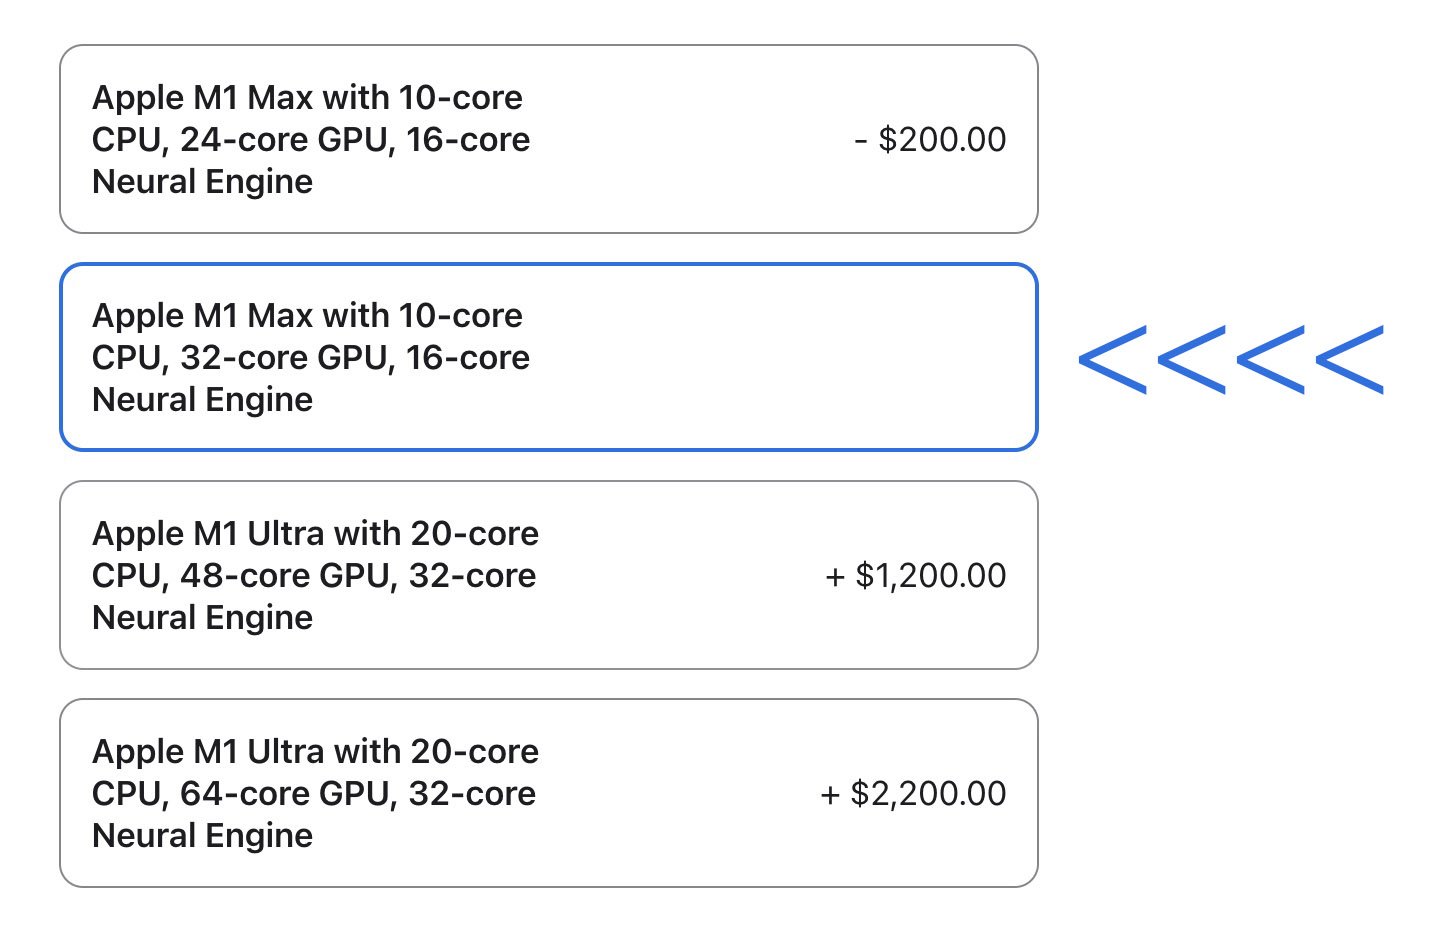
Why did I choose this processor? A CPU core (or Central Processing Unit core) is like the brain of your computer. It is responsible for carrying out the instructions and calculations needed to run programs and perform tasks. Each core in a CPU can handle multiple tasks simultaneously, known as threads. (Think of it as having multiple workers in a factory, where each worker can perform a separate task.) Having multiple cores allows your computer to handle multiple tasks at once, making it faster and more efficient.
I went with the 32-core CPU because I am someone who keeps many programs (probably too many) and internet tabs open at any given time - it’s just the way I work, so I wanted to make sure that the computer could keep up with me and my future needs. When I buy a new computer I do like to future-proof it for 3-5 years. At this price point, the extra $200 for the additional cores was negligible.
MEMORY

This choice was easy. For a photographer who does a lot of editing work, having enough RAM to ensure smooth and efficient performance is important. Photo editing software like Adobe Photoshop and Lightroom can be memory-intensive, especially when working with high-resolution images or multiple files simultaneously. My old 27” iMac had 40GB of ram and it ran quite smoothly, although i sometimes ran into bottlenecks when running complex actions so I knew I wanted a little more to allow for even faster workflows.
I went with 64GB and couldn’t be happier! Photoshop and Lightroom are ⚡ lightning fast.
STORAGE

As for storage, I opted for the 2TB SSD drive. For most people this is probably overkill. Most of us photographers work off of removable drives anyway. So why did I get it? One word….DROPBOX.
Dropbox is one of my main backup sources for both client and personal files. It also houses all of my working files (backdrops, actions, elements, overlays, etc.) And while Dropbox is cloud-based, if I want fast access, it needs to maintain copies on my hard drive as well. For me, the whole purpose of upgrading to this computer was speed and efficiency. If I have to wait for my files to be downloaded from the cloud, I lose that speed.
My 27” iMac had a 1TB drive and after four years I was close to maxing out my space. The 2TB drive future-proofs my storage needs. Could I use an external drive for this? Sure I could - but once again, I’m upgrading for speed, and external drives have slower transfer rates, not to mention, I wanted a clean desk workspace (minimal toggled external drives.)
Honestly, I think most photographers would be fine with the 1TB or possibly the 512GB drive and I don’t see any reason to get 4TB or 8TB. Apple charges a premium for storage…you can save some significant money here so take some time to think about how much internal storage you REALLY need, but do remember you can’t upgrade it later.
THE MONITOR
This is where I struggled. Selecting the Mac Studio’s configuration was a piece of cake compared to the amount of research and thought that went into purchasing a monitor. Why? As an iMac & laptop user it’s been a very long time since I had to purchase a separate monitor and Apple didn’t make it easy by charging a hefty $1600 for the base model Studio display. Seriously Apple? 😠Ugh.
So after all the research, I narrowed my options to the LG 27MD5KL-B 27 Inch UltraFine 5K, LG Monitor 27MD5KL-B Ultrafine 27" or one of the Dell Ultrasharps. The LG 5k was probably the best alternative, but the cost wasn’t that much less and I wanted the little benefits of controlling sound and more with my apple keyboard. Another consideration is that most monitors don’t have a camera built in and most have horrific speakers (or none at all). So those are add-ons. The Studio Display has both. I also was concerned about color calibration. I have used Macs for years, and NEVER had an issue with color calibration. My prints always come back from my labs perfectly matched. Before I made the move to iMac, I could never get the calibration right - even with the use of calibration tools.
The problem with the 4k monitors is that you can run into a scaling issue. While it probably isn’t a HUGE deal (plenty of people us 4k monitors with the Mac Studio), I was coming from a 27” iMac with a 5k monitor. This computer is an upgrade - I wasn’t going to downgrade the monitor. My other option was to wait for the 5k Samsung S9 monitor that is expected out soon (no release date yet), or bite the bullet and go for the Studio Display.
In the end…
I went for a REFURBISHED Studio Display. I saved a couple hundred dollars and am enjoying the 5k monitor I am used to.
A very cool thing that I did not know until doing this research is that the Apple Studio Display has a calibration setting for photographers as well as design/printing (and more). These setting change the whitepoint as well as some other things that will maximize the screen for what you are doing. You can read more HERE.
On a side note, I have purchased MANY refurbished Apple products and never had a problem with any of them. BONUS - You can get Apple Care for your refurbished Studio Display!
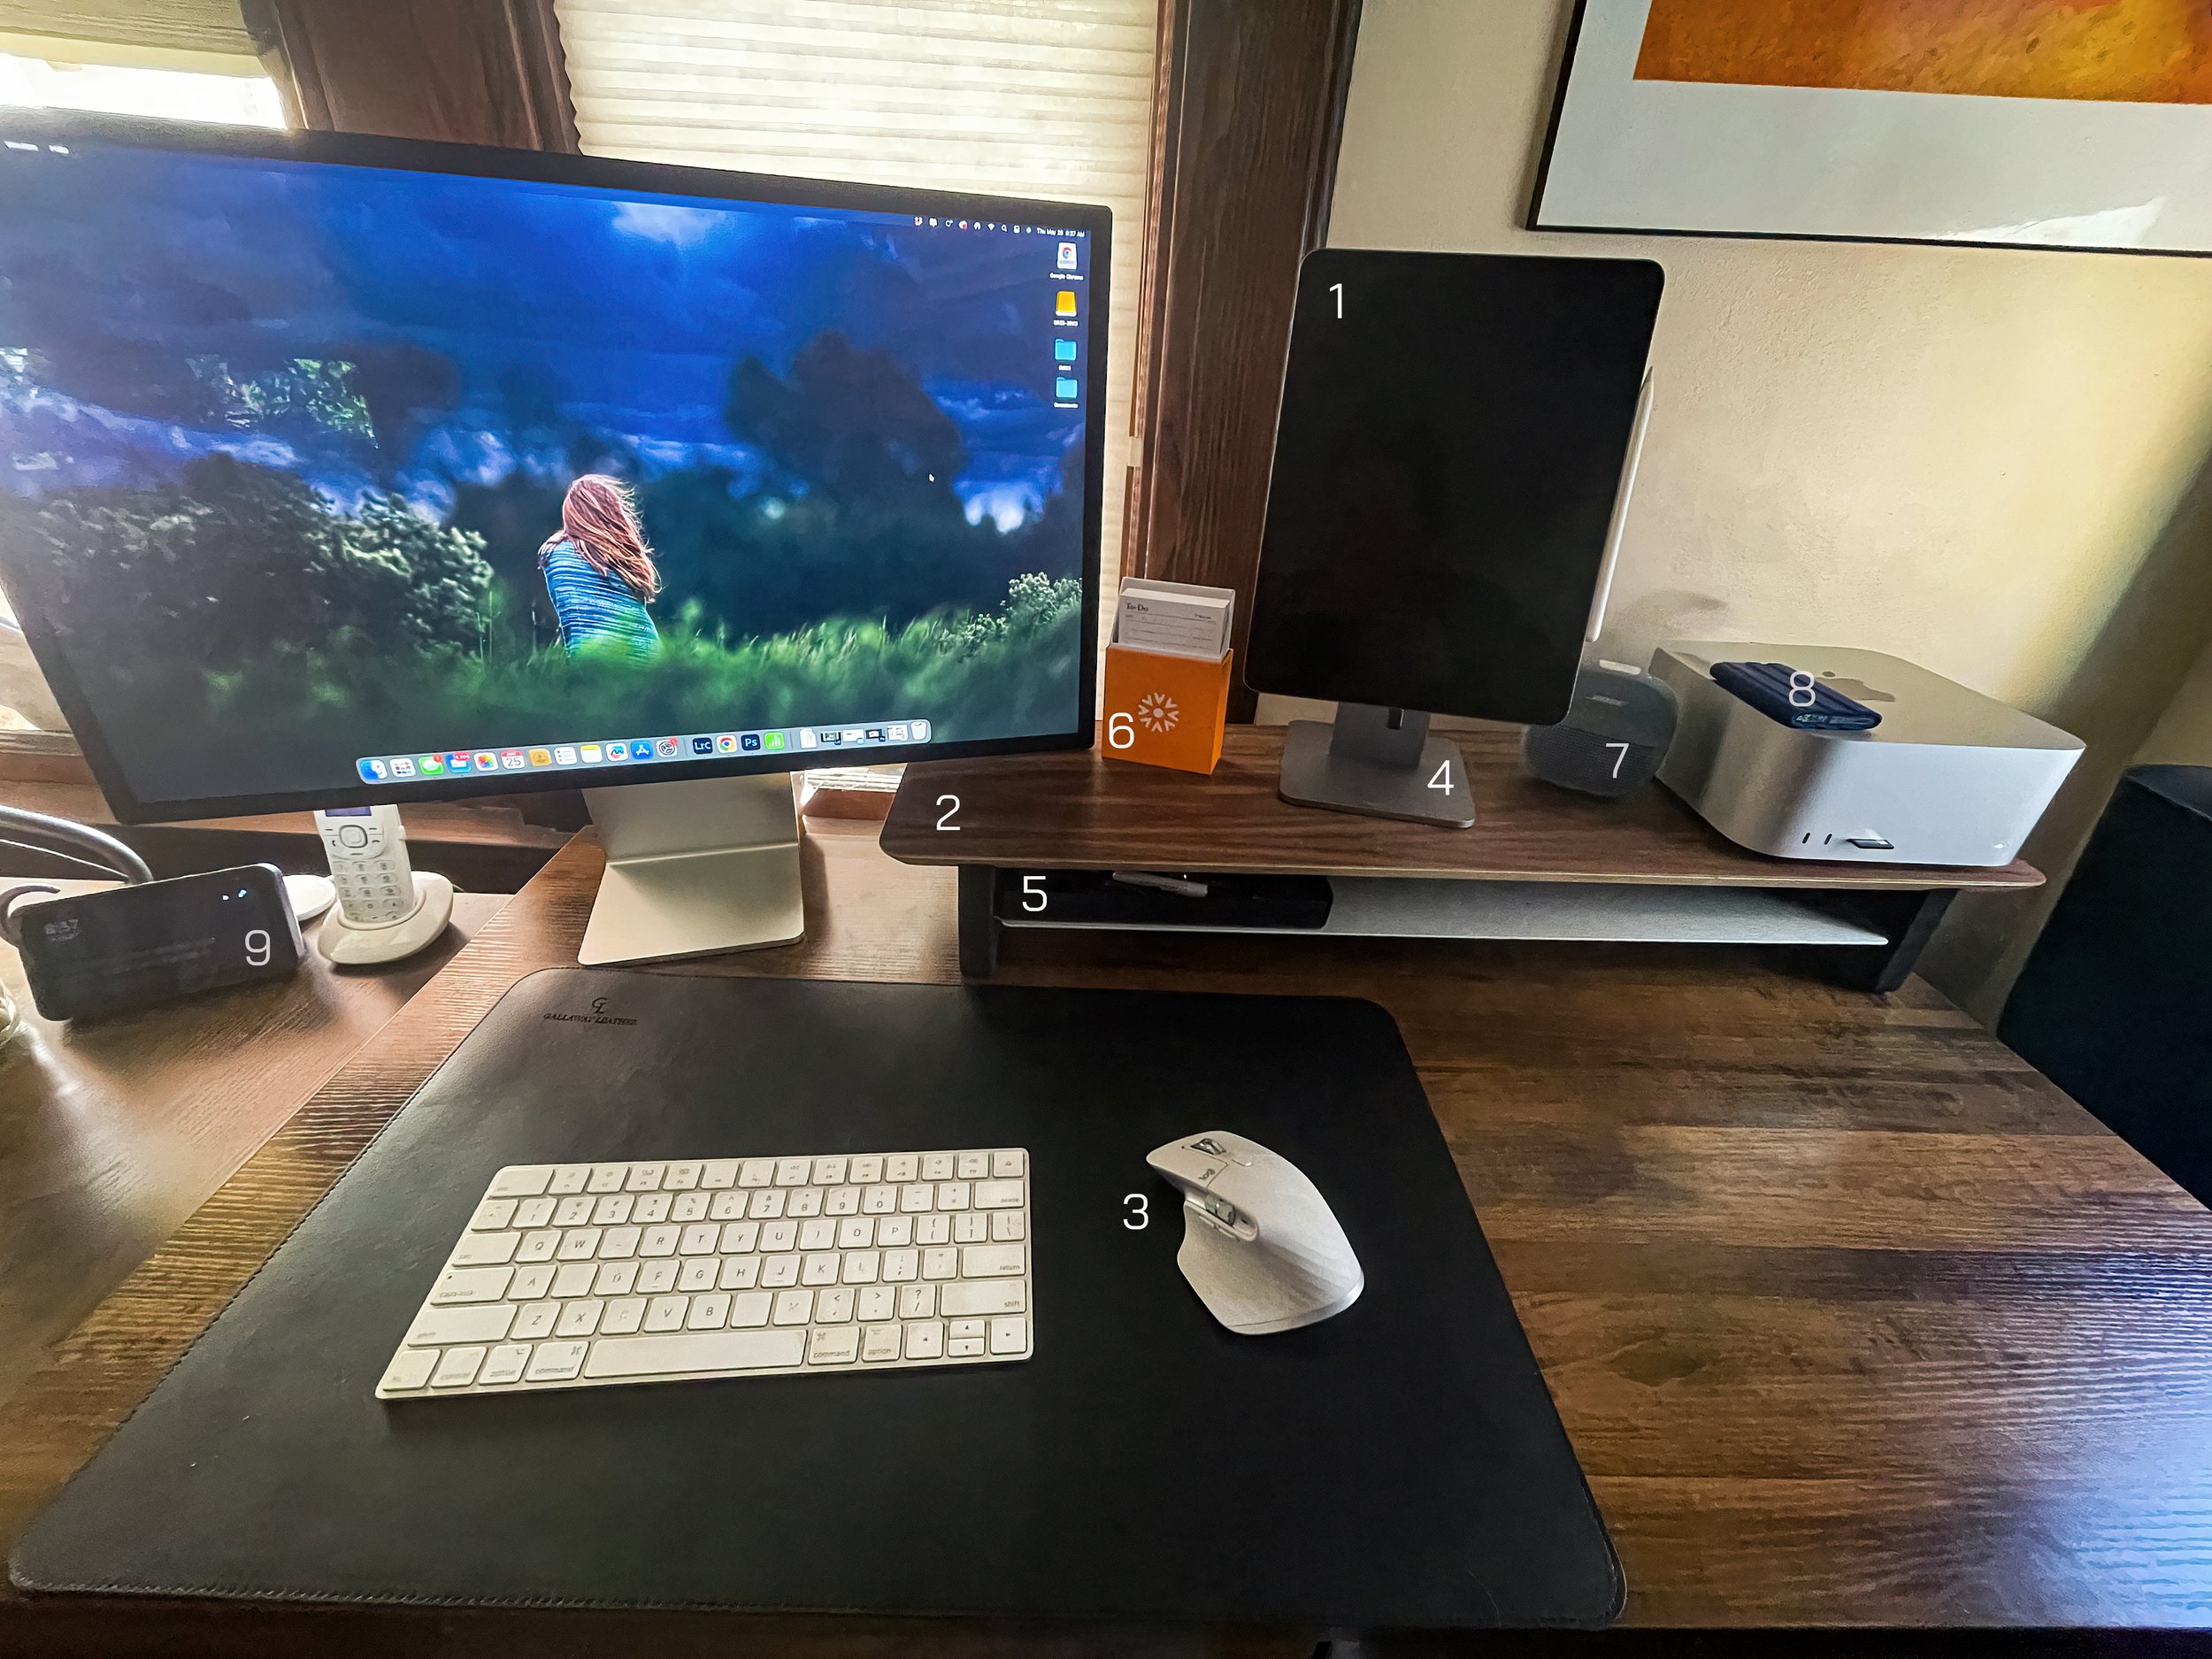
THE ACCESSORIES
(1) iPad Pro
I have been using two monitors for many, many years - it just makes my life easier. Last year I moved my desk to my living room due to a basement flood, and after 6 months of working in my living room, I decided to keep it there even though the basement has since been repaired. In an effort to minimize and maintain a clean look I decided to forgo the second full screen monitor and use my iPad instead. I now have the option to use the ipad as an ipad OR a second screen. Apple makes the transition between them sooooo easy!

(2) Grovemade Desk Shelf
OK, I’ll admit, I splurged on this one. I couldn’t help it. After watching so many Mac Studio videos I kept seeing this beautiful desk shelf. I researched it and found out it was made by Grovemade. Their products are gorgeous and have very clean, minimal lines. I splurged and got the Medium in Walnut Plywood (I couldn’t justify the solid wood), and it matches my desk perfectly!

(3) The Mouse
I have used Apple’s Magic Mouse for years, and while I do love the sleek look, I have to admit when they changed over to the rechargeable battery the placement of the cable port became a problem. The mouse always seemed to stop working when I was deeply involved in work and having to stop to turn the mouse over to plug it and wait (even if it was 5 minutes) it killed my workflow. With the new Mac Studio I decided to try out this Logitech MX Master. It took a little getting used to, but overall it’s easier on my wrist and the additional buttons allow for custom programming (I use the wheel to quickly control my brush size in Photoshop). The best part? The charging port is on the tip of the mouse, so I can use it while it’s charging. Overall a WIN!
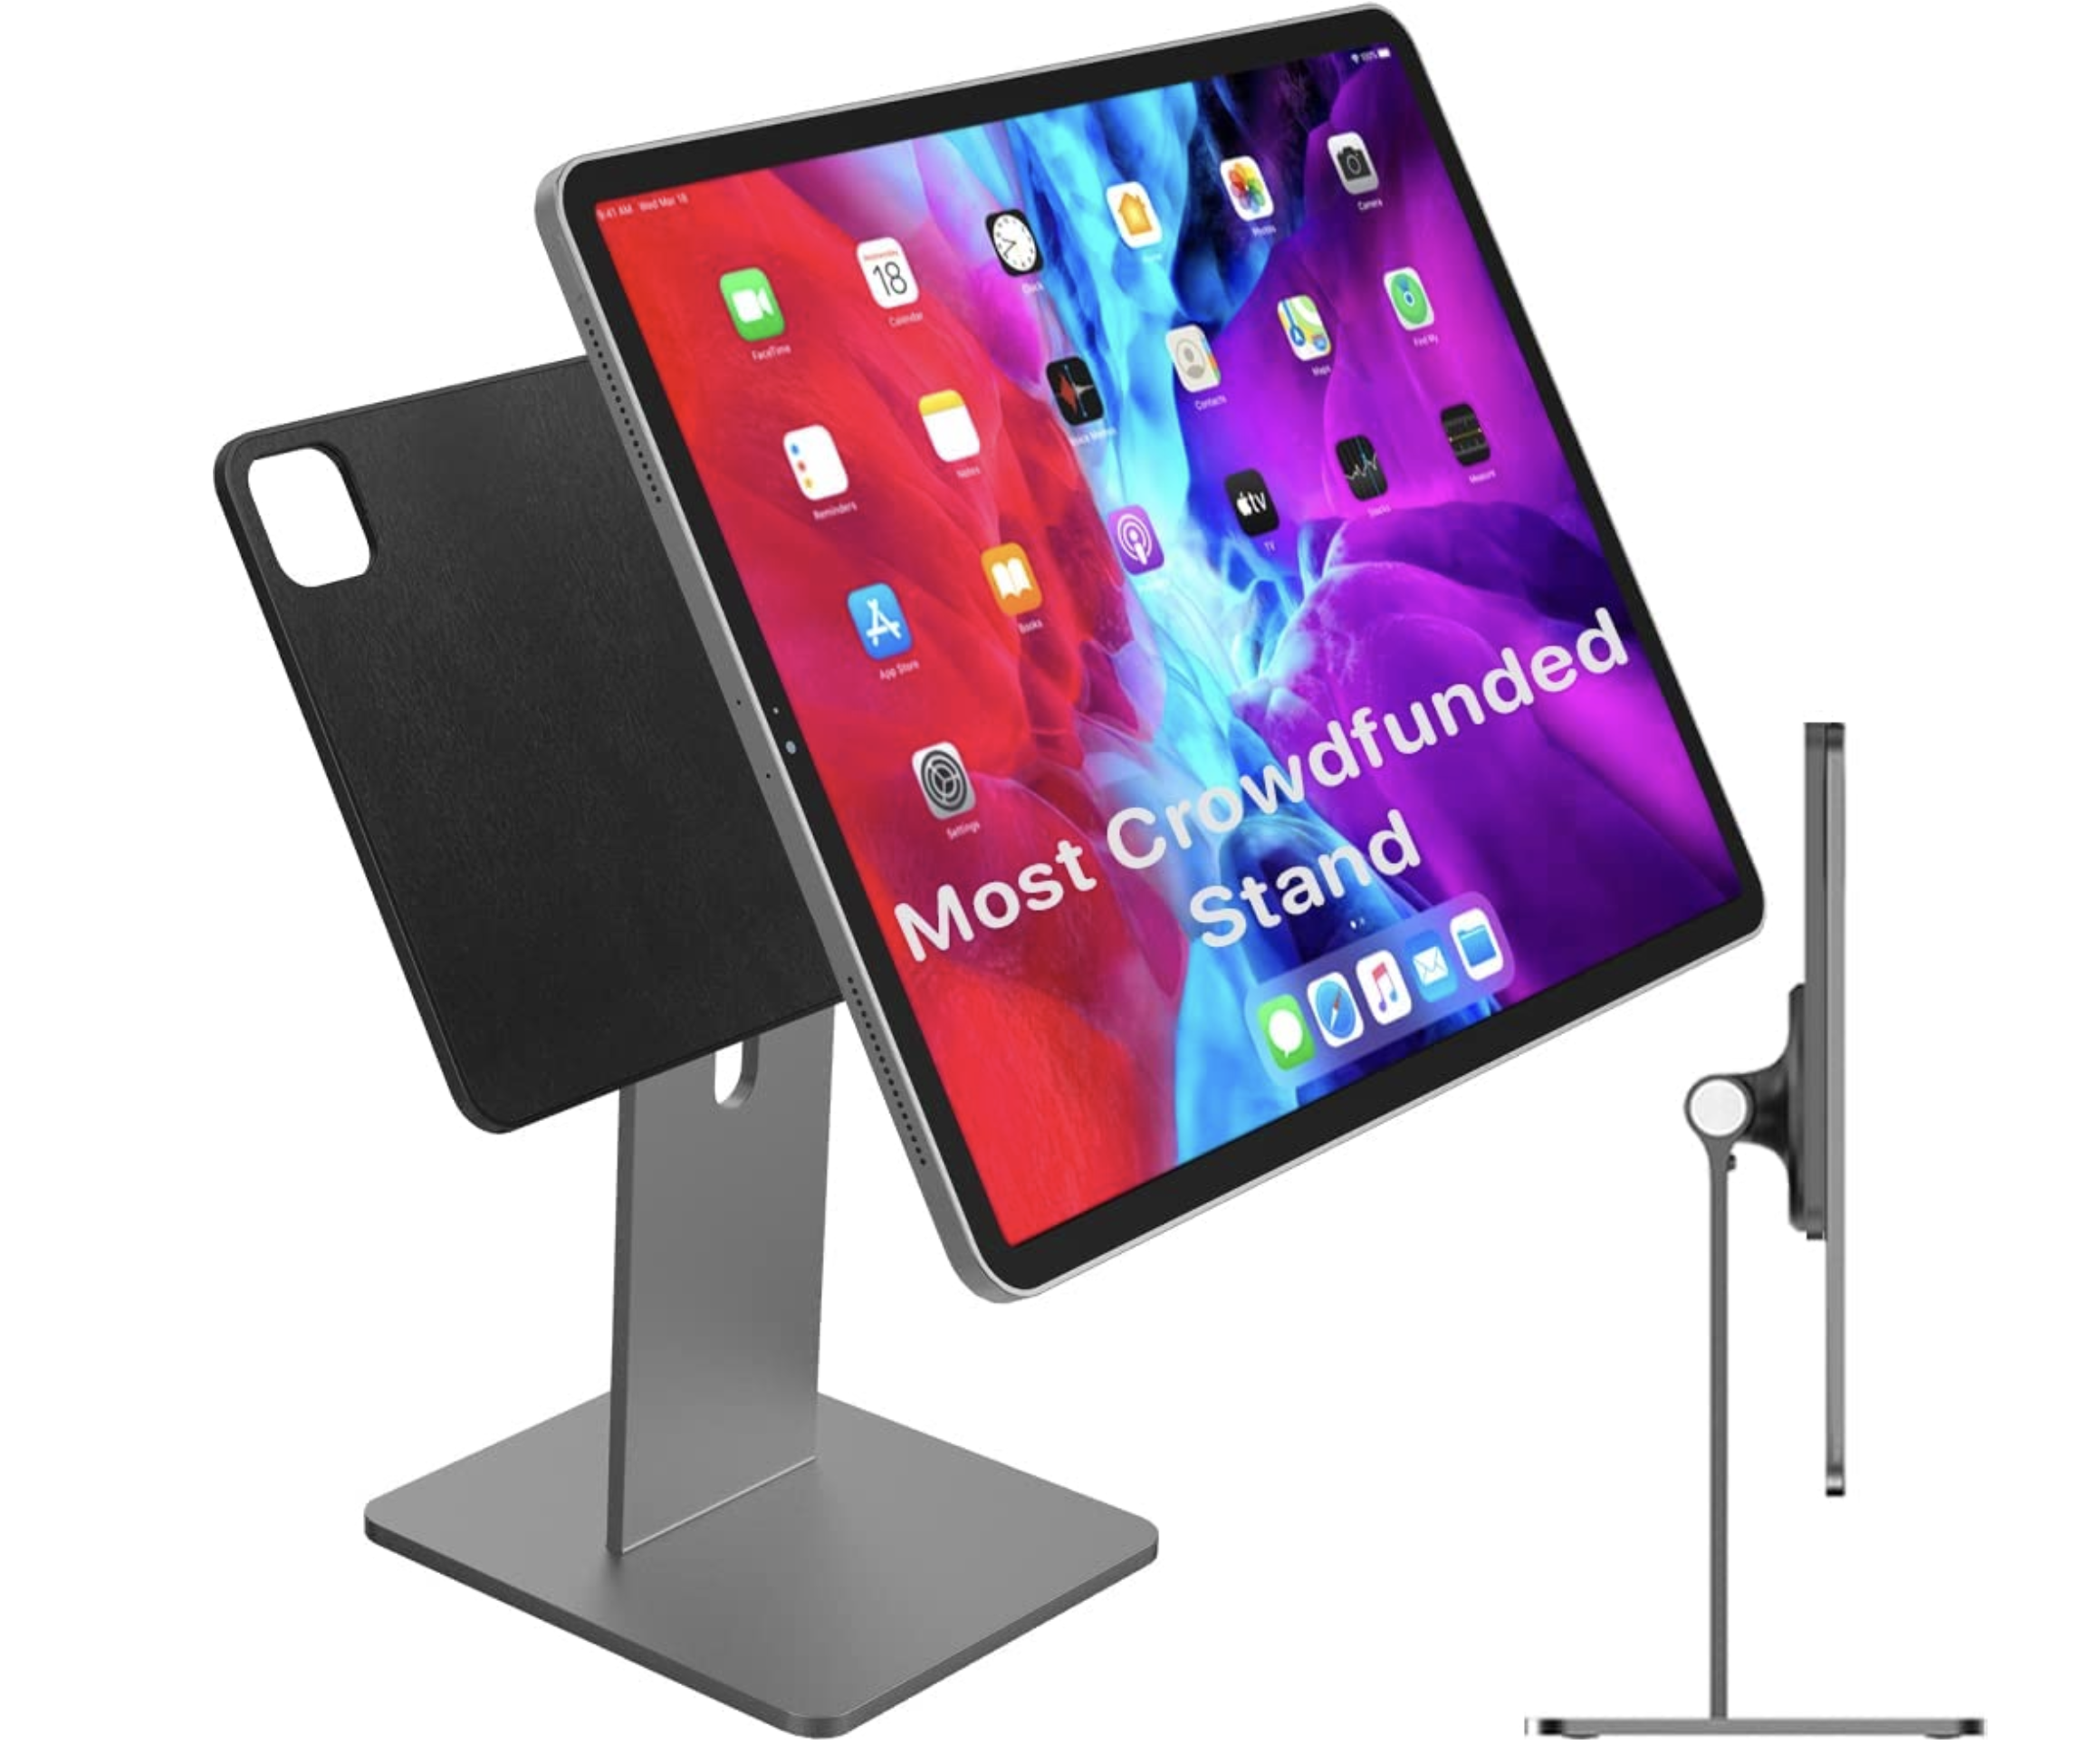
(4) iPad Stand
I picked up a cool CharJenPro Magnetic iPad stand. It’s magnetic so taking the iPad on and off is super easy and it swivels easily between landscape and portrait orientation. The best part is how seamlessly it fits in with the Apple look.

(5) Desk Tray
I needed something to hold my pens and other desk paraphernalia, so I wanted a desk tray. I loved the one from Grovemade, but not the cost. I found this EDC Desk Organizer Valet Tray which is similar and does the job just fine. I love that it fits right in the Desk shelf. Perfect!

(6) To Do List
I try to manage my todos electronically, but I just don’t follow through. I’m old school - I need a written list that I can cross off. I found this cute and colorful box that adds a bit of spunk to my desk. The lists are nice and thick and the best part - you can replace the paper when you run out!

(7) Bose SoundLink Micro
I’m a BOSE fan, have been for years. My earbuds and all my speakers are BOSE. I like the sound, it’s rich and full of base. I picked this Soundlink Micro waterproof portable bluetooth speaker up last year to fill my need for a small speaker to take with me wherever I need. When not traveling with me, it sits on my desk. On a side note, I actually am totally fine with the Apple Studio Display’s sound for everyday computing needs so I don’t connect to the BOSE on a regular basis at my desk, but it’s there if I need.

(8) Samsung External SSD Drive
I’ve been using Samsung SSDs for some a few years now. I use a 1 or 2TB one as a working drive for my client work and I also use one for my TimeMachine backup drive. These come in up to 4TB and are quite affordable!
(9) Echo Show 5
While they don’t make this particular model any longer, they do have newer models available. The Echo 8 is probably the closest available option. This smart display is super handy and great for quickly looking things up (sans typing), controlling my smart appliances, getting a quick update on the news and weather and acts as a verbally responsive alarm clock. I use it every morning to video call my Mom!
ODDS & ENDS
Desk Mat
Grovemade makes some really beautiful desk mats, but once again, I couldn’t justify the cost. I picked up this nice Gallaway Leather Desk Mat on Amazon for a fraction of the cost. It not only looks nice but is the perfect mouse & writing pad.
To keep all my wires neatly organized behind the scenes, I picked up these Wire/Cable Labels and Cable Ties.
FUTURE PURCHASE
As you can see, I spent a small fortune on this upgrade, and I still have a few other things on my “want” list. Eventually I’ll get them, but for now I need to give my wallet a break. Below is the one thing that I will be adding in the near future.

Satechi Mac Hub
The Satechi Mac Hub with SSD Enclosure is a must-have accessory for any Mac user. This hub offers users a multitude of ports to connect all of their devices, as well as an SSD enclosure that is perfect for providing additional storage space. The sleek and modern design of the hub fits seamlessly with the aesthetic of any Mac device, providing a seamless and efficient experience for the user. With the Satechi Mac Hub with SSD Enclosure, users can easily transfer files, photos, and videos, while simultaneously charging their devices and maintaining the fast speed they expect from their Mac device. Overall, the Satechi Mac Hub with SSD Enclosure is an essential tool for any Mac user who seeks to optimize their workflow and improve their daily usage of their computer.
*Disclosure: This blog post contains affiliate links, and I may ear a commission from qualifying purchases. The inclusion of affiliate links does not influence my editorial integrity or the opinions I express in my blog posts. I only promote products or services that I genuinely believe in and that I think will bring value to my readers.
Let me know if the comments if you found this blog post helpful. Feel free to add any items or accessories that you find useful!